
You can make embossed foil wall art in five easy steps! This is a great project to do on your own or with kids. I have done this process with students of all ages in my art classes a couple different times, and it has been a great success!
Step 1: Gather Supplies
Here’s what you will need:
• heavy weight tag board (or cardboard, or wood piece)
• aluminum foil a few inches larger than the size of your board
• bottle of glue (or hot glue gun)
• flat brush or foam brush
• black ink or black shoe polish
• steel wool
• something like: small piece of felt, wooden brayers, popsicle sticks, q-tips
• optional: metallic craft paint and round paint brushes
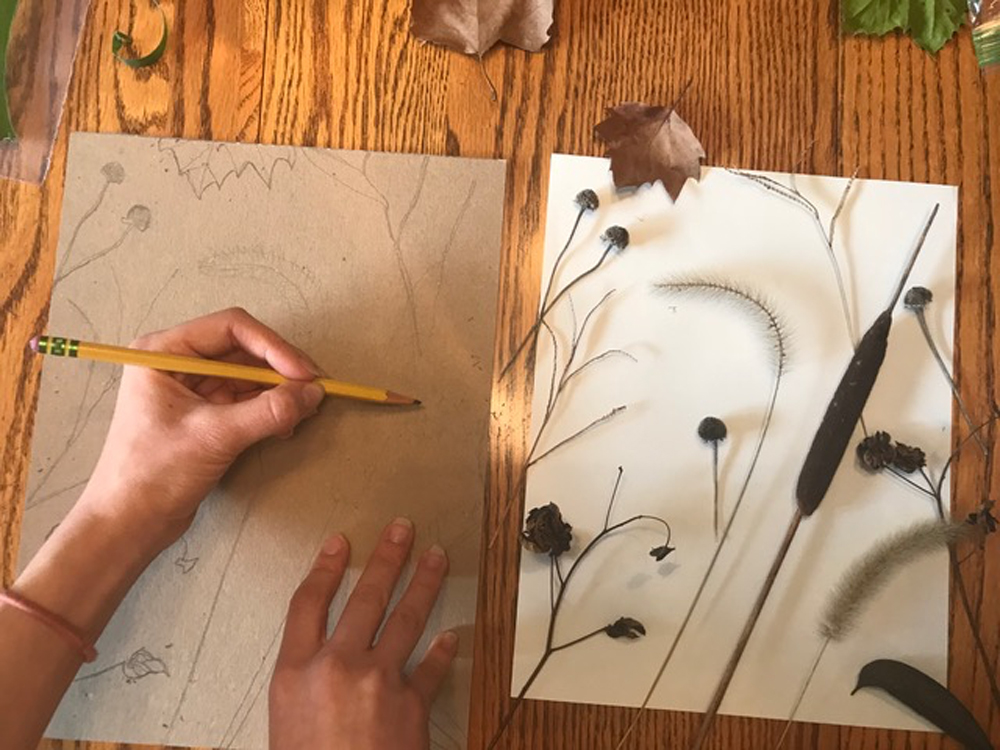
Step 2: Draw the design
Decide what you want to create, and draw it on the board.
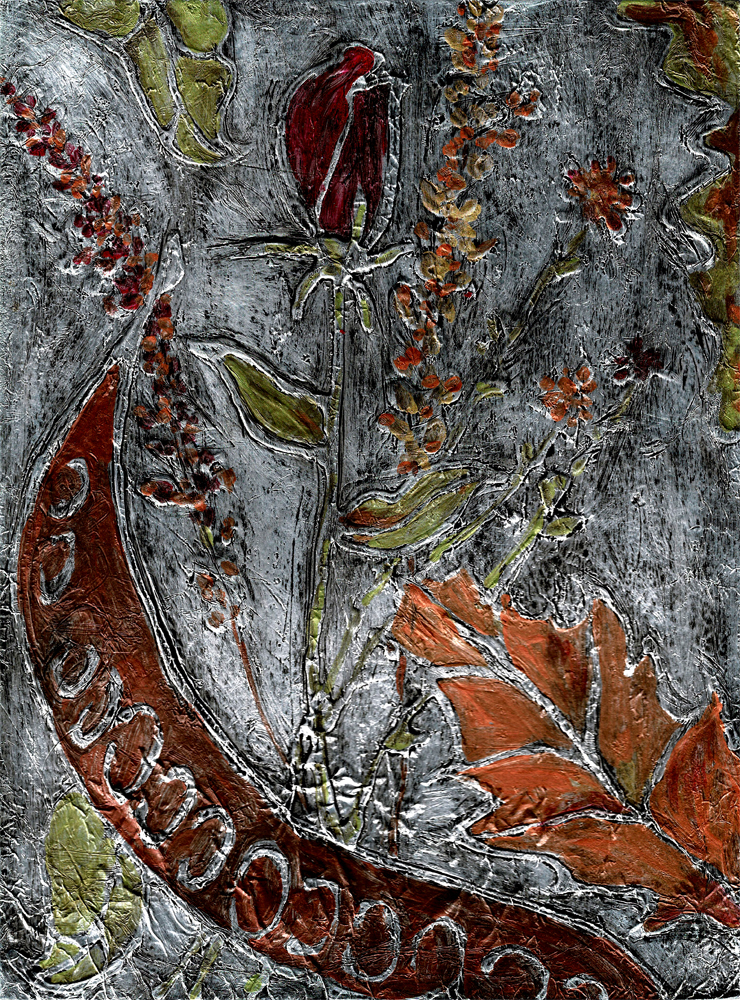
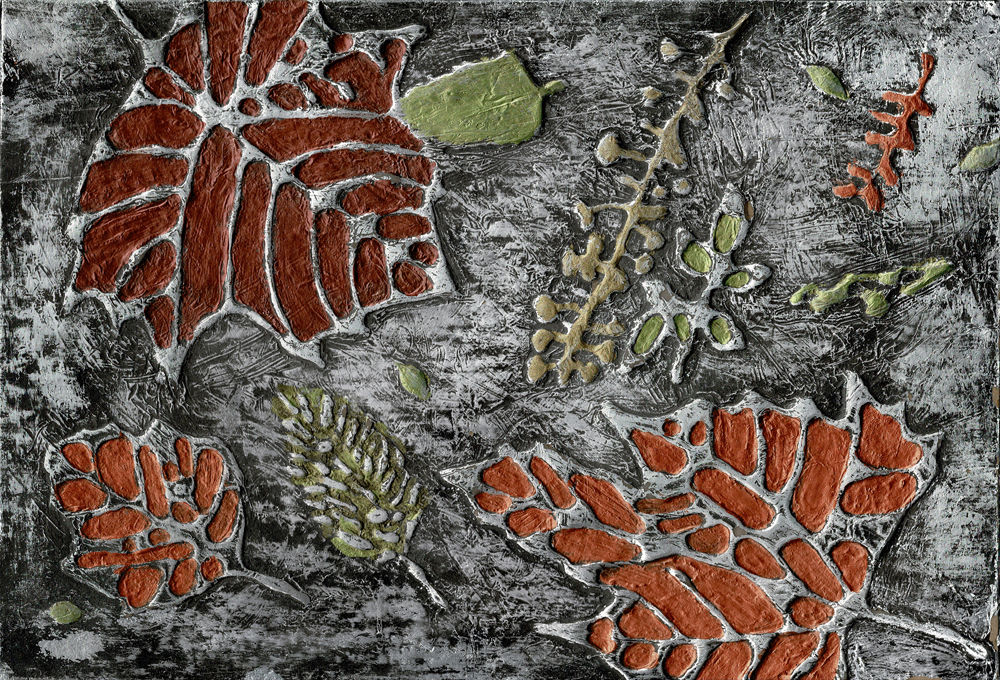
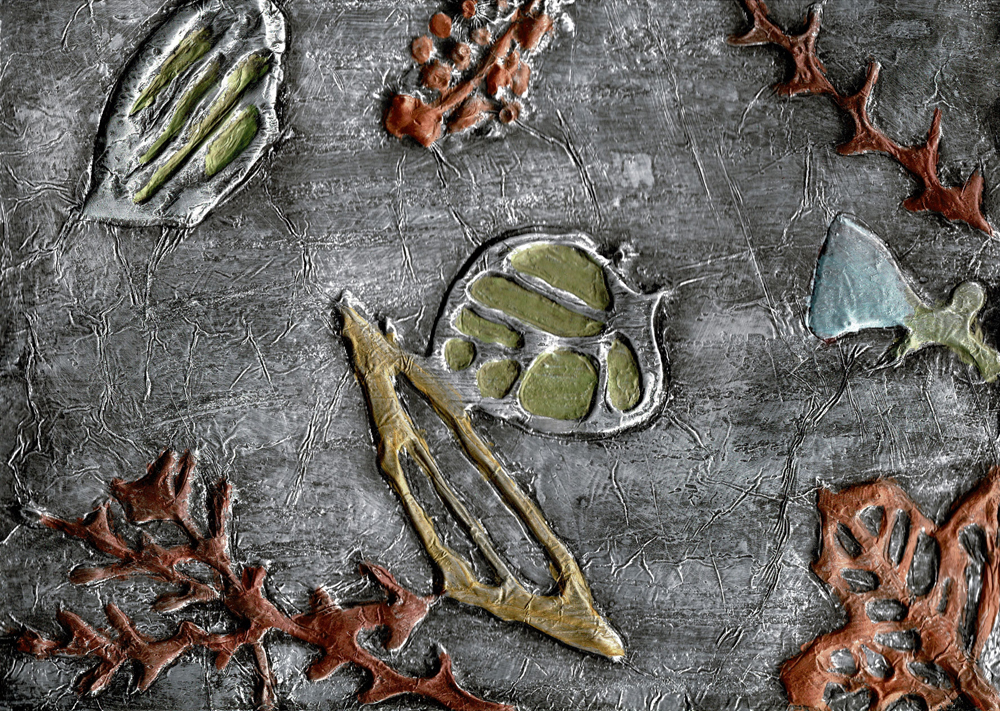
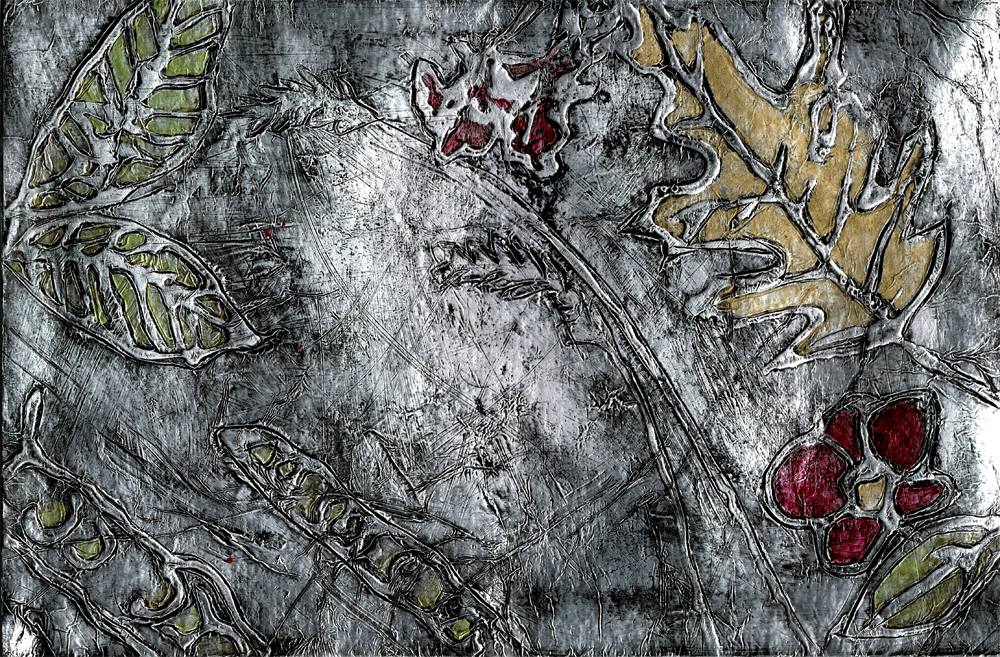
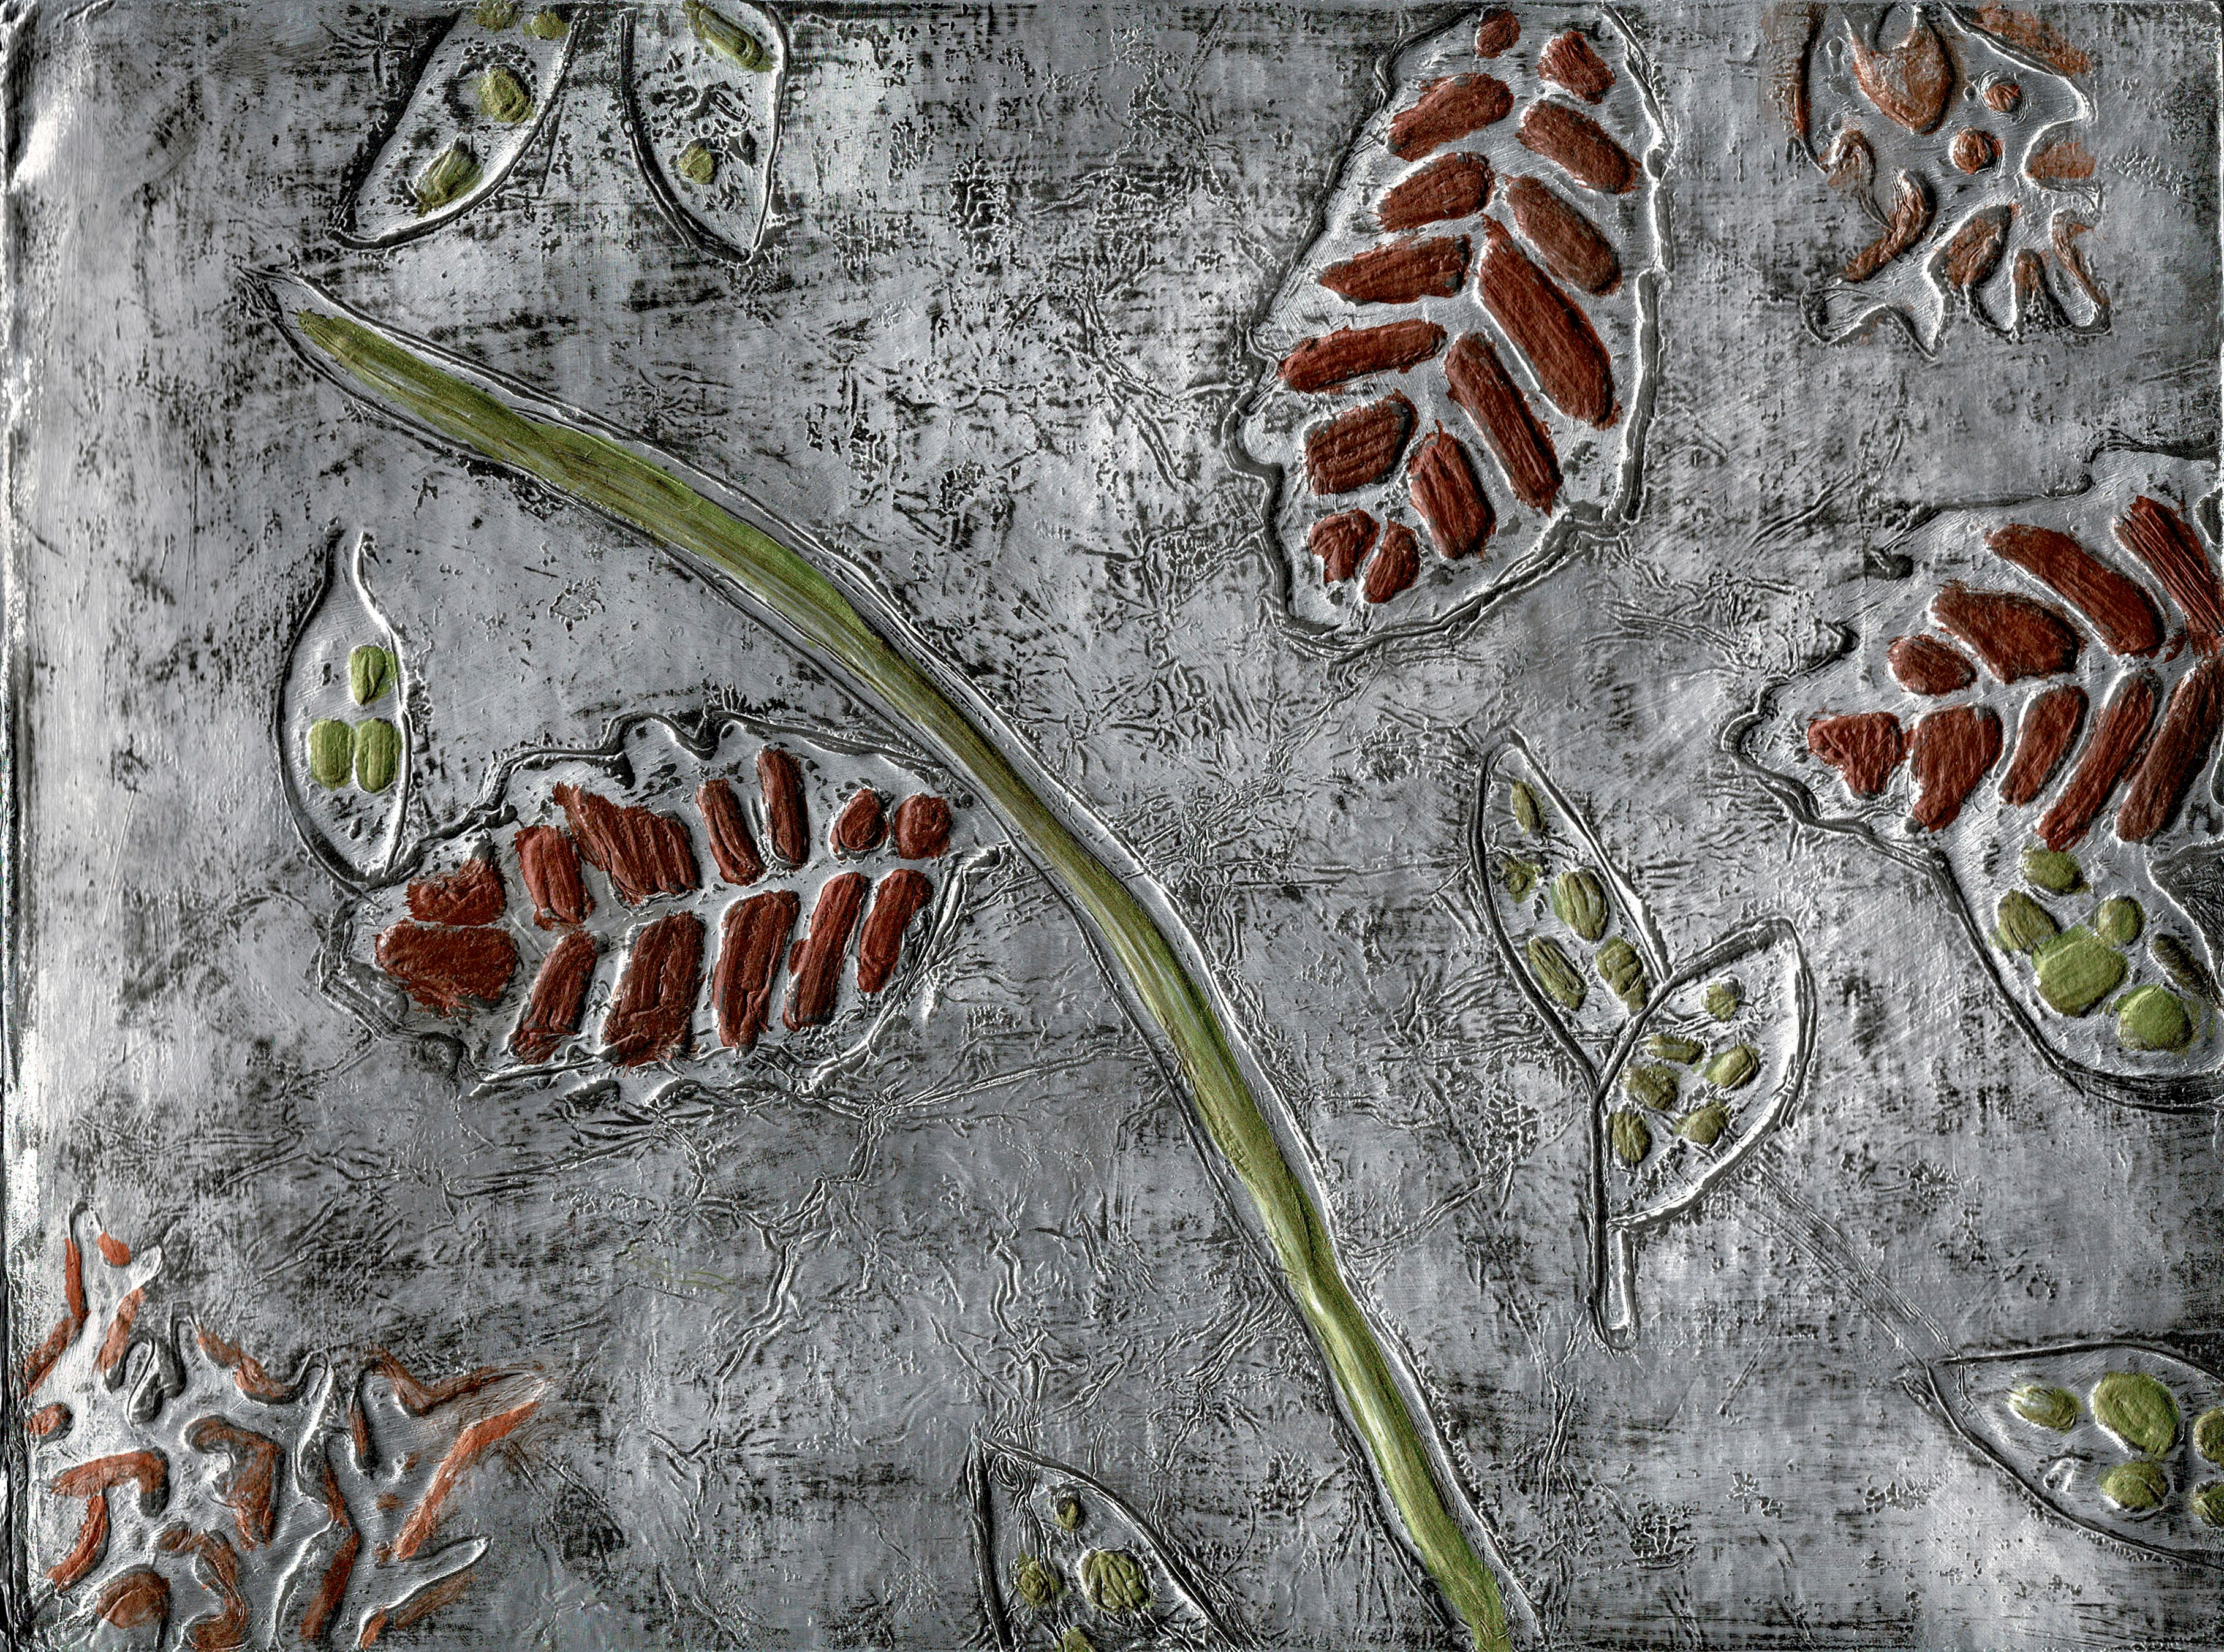
For this project, I used a fall nature theme, but you could do anything with this project! This technique would make a fabulous Christmas or holiday art project! Here’s how we did the fall themed art:
The students gathered items from nature such as fall leaves, seed pods, dried flowers and foliage. Then they created a pleasing composition by laying the various leaves and items on a piece of blank paper. In drawing, I teach my students to look at both the positive space (the item) and the negative space (the background). The positive and negative spaces share an edge, so when you draw the negative space you are essentially drawing the positive shapes. So, after creating their composition, I had them draw the design onto their tagboard, looking at both the positive shapes and negative spaces. (Optional: If you don’t want to use this as a drawing exercise, you could just place your items on your tagboard and trace around the items.)
Step 3: Trace with glue
Trace the lines with glue from your glue bottle or hot glue gun. You want a nice bead of glue, so don’t spread the glue out. Let dry completely.
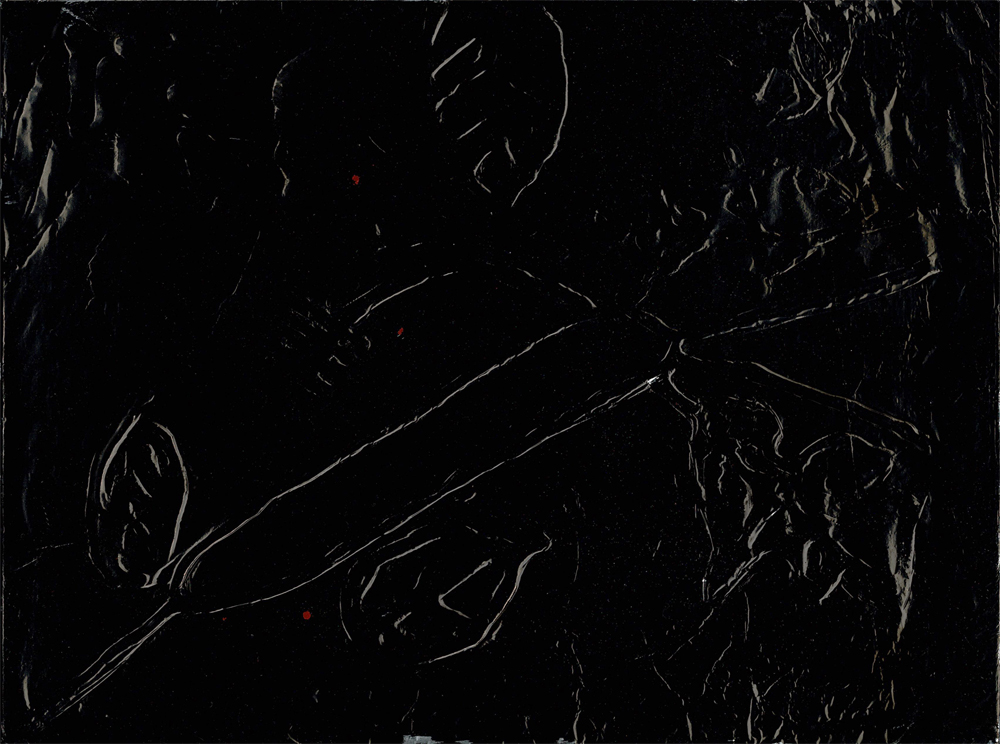
Step 4: Emboss with foil & ink
Cover entire board with glue and spread out with flat or foam brush. Place aluminum foil, shiny side up, over glued board, and burnish the foil down by rubbing with felt or other material. Work from the center out, to remove all air bubbles. Take wooden stick or q-tip and rub along the edges of glue lines, so that the you have a nice indentation along them. You can also rub the flat areas with the wooden stick. This will give more little indentations for the ink to seep into, which will create texture. Wrap the excess foil to the back and glue it to the black of your board.
Apply a thin coat of black ink or shoe polish to the top of your aluminum foil. Use a paint brush to spread it out if needed so the front of the foil covered board is completely coated with the black ink. Don’t make the ink too thick, or it will be hard to rub off in the next step. Let dry completely.
Step 5: Finish it!
Use steel wool to rub off as much of the ink as you desire. The ink will have seeped down into the crevices, so it will have a nice aged look. After rubbing the ink off, you can either just leave it to have an aged metallic look, or paint certain areas with metallic craft paints. I like to paint the ares within the glue lines, or on the glue lines themselves. But make sure to leave plenty of areas with just the metallic ink look. You can then frame it, or just set it on a shelf. Or if you chose to use a piece of wood, you can just attach a hook to the back and hang it on the wall. You can make embossed foil wall art for any style or season! Get creative & let me know how it turns out!
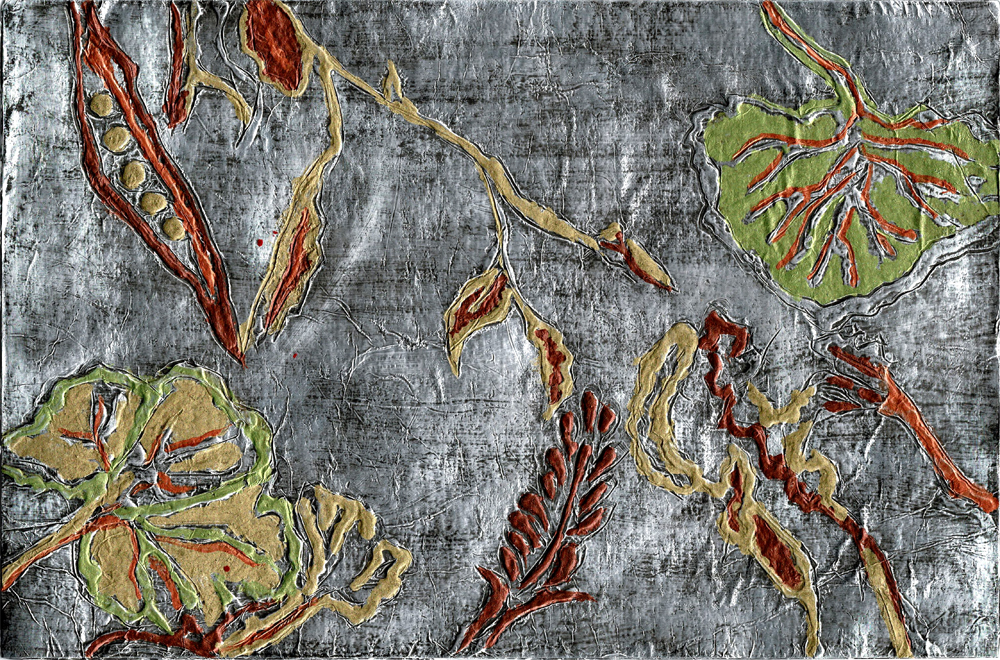
Here are examples are some of my students’ embossed foil art pieces:

To see more examples of Foil Relief Wall Art, read my new blog post: Family Craft – Foil Relief Wall Art.
Wow! That is beautiful! I love it!
Thanks, sis!! It really is a fun project. Several steps, but worth it!
That is so cool, Julie! So well explained too! Fun and beautiful project.
Thanks, friend!